Design to Shop Drawings, Engineering Details That Prevent Rework
Design to shop drawings, the fastest path to fewer mistakes
Rework is rarely caused by labor alone. It is usually triggered by missing or unclear engineering details, unresolved clashes between trades, incorrect assumptions about tolerances, or approvals that happen too late. The practical tool that converts intent into buildable instructions is the shop drawing set, supported by engineering details that are coordinated, code compliant, and aligned with real site conditions.
For Gavril Construction Company Ltd, “design to shop drawings” means creating a reliable bridge from architect and engineer design documents to fabrication, installation, and inspection. When that bridge is strong, field crews install once, inspection passes the first time, and procurement aligns with actual needs. When it is weak, projects experience RFIs, change orders, schedule slippage, and costly removals of completed work.
What matters most, the rework prevention essentials
Shop drawings prevent rework when they do four things consistently. First, they resolve interfaces, meaning where one trade ends and another begins. Second, they lock down correct dimensions and tolerances, including how as built conditions are handled. Third, they define connection and support details that satisfy loads, movement, and code requirements. Fourth, they follow a controlled review and approval workflow so the field only builds from current, approved information.
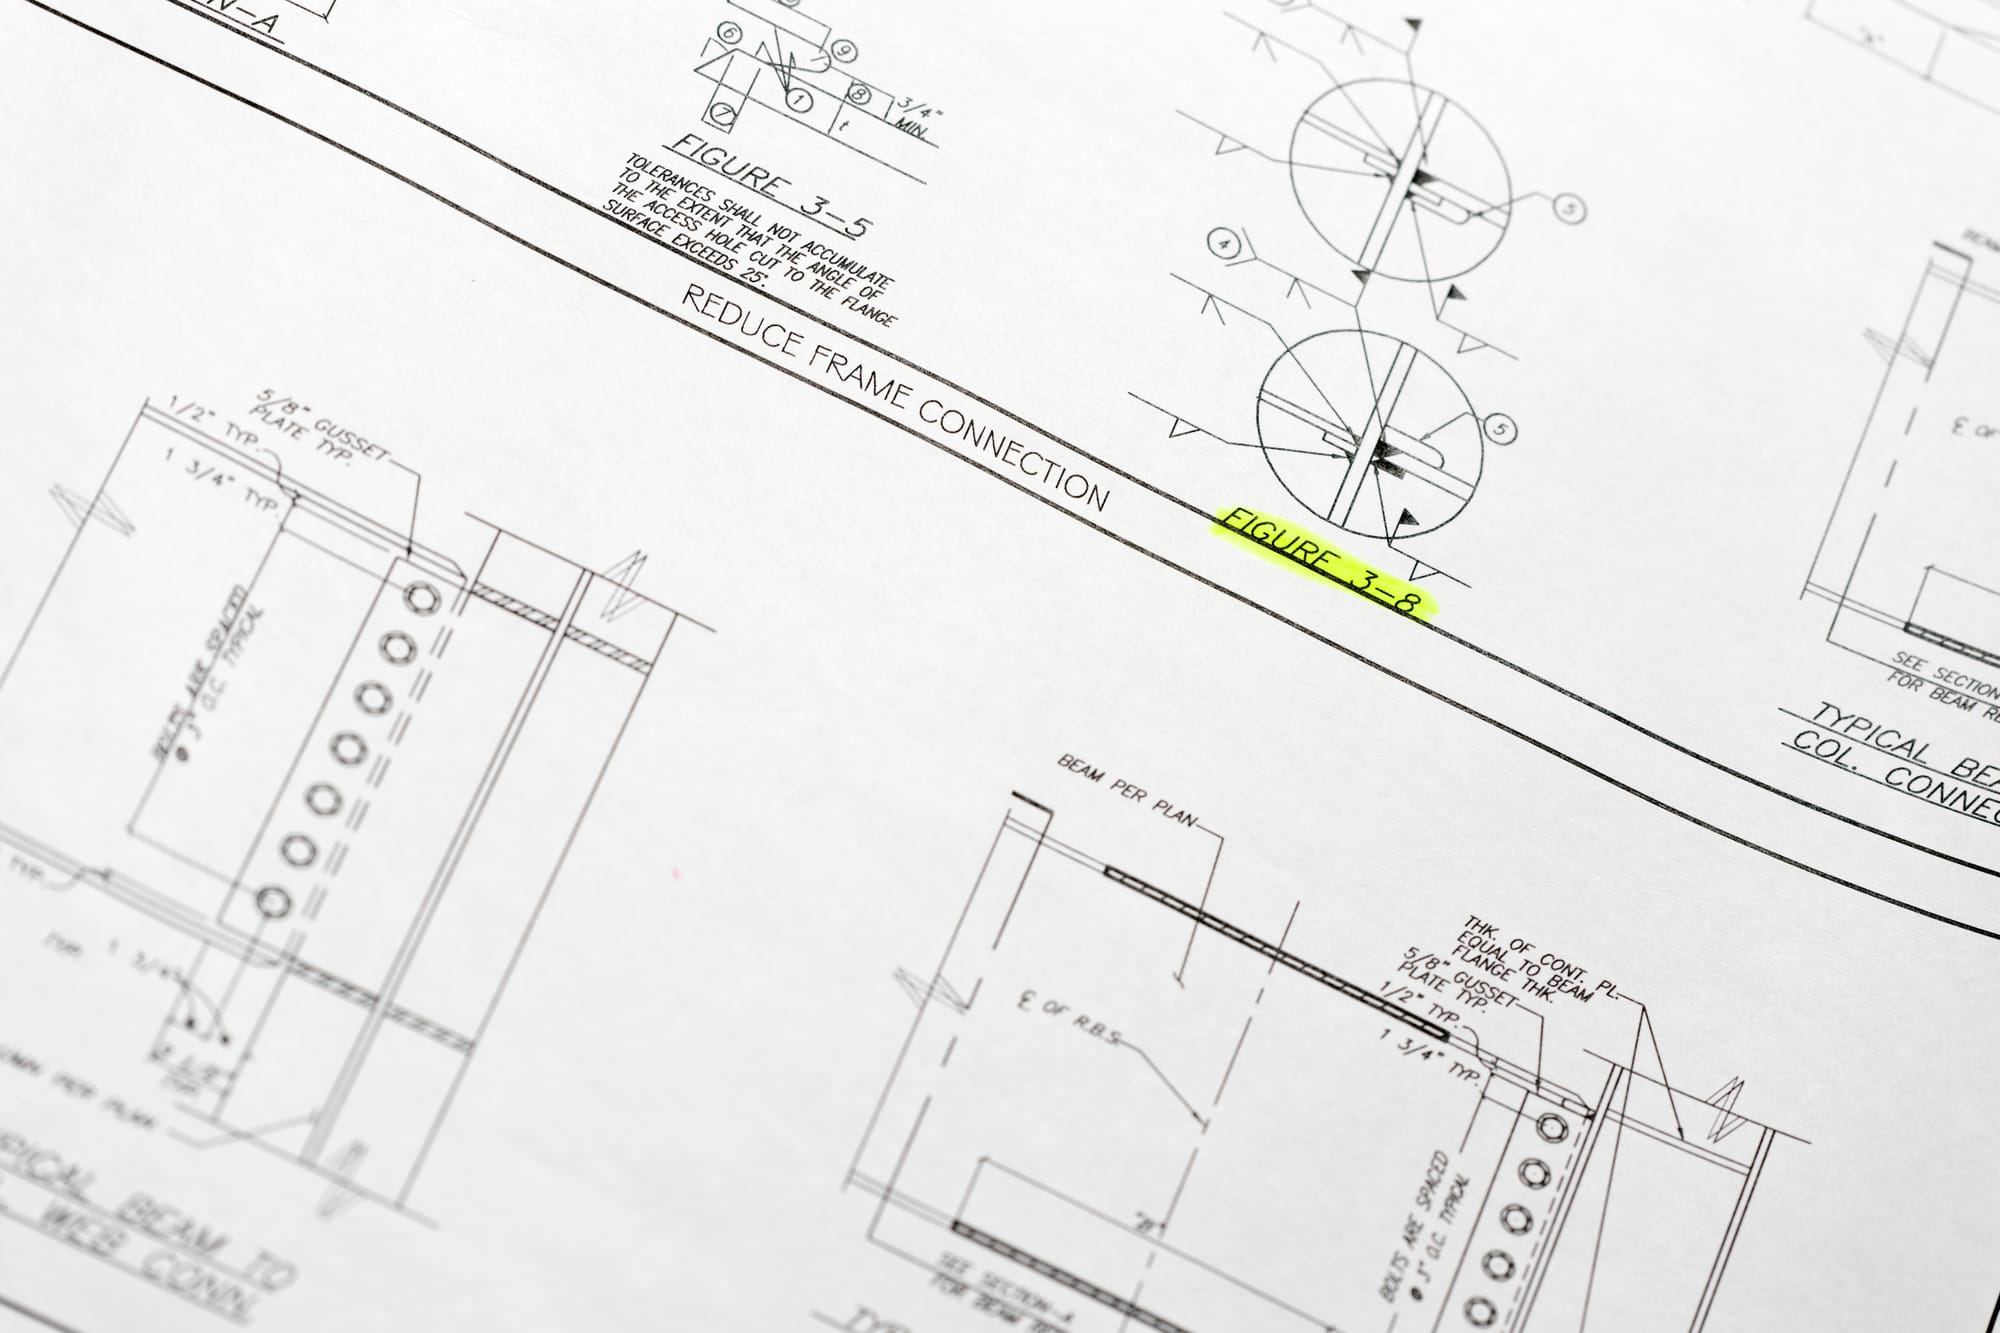
The highest leverage engineering details typically include load paths and connections, embedded items and anchors, penetration framing, fire and acoustic assemblies, waterproofing transitions, seismic bracing, deflection and movement joints, equipment clearances, and installation sequences for complex areas. These details are often not fully defined in design drawings, or they are shown in a generalized way that is not sufficient for fabrication.
Key outcomes you should expect from a strong shop drawing process
- Fewer RFIs and faster RFI closeout because questions are answered during coordination, not in the field.
- Reduced procurement waste because quantities, lead times, and specifications are confirmed before ordering.
- Higher inspection pass rate because code requirements and manufacturer instructions are embedded into the details.
- Less schedule risk because long lead fabrication can start earlier with confidence.
- Cleaner handover because closeout documents match what was actually installed.
What “design to shop drawings” actually means
Design drawings communicate intent. They define performance requirements, spatial layout, major dimensions, and overall code strategy. Shop drawings communicate execution. They show exactly how materials will be fabricated, assembled, supported, integrated with adjacent work, and verified for quality. The transition from design to shop drawings is not a simple redraw. It is an engineering and coordination exercise that transforms intent into a buildable, inspectable plan.
Shop drawings can include fabrication drawings, installation drawings, setting out information, schedules, wiring and controls diagrams, coordinated sections, and product data. They can be 2D, 3D, or both. They can be created by specialist subcontractors, fabricators, or dedicated detailers, but they must be reviewed against the contract documents and coordinated with the whole project.
Why rework happens, the root causes that shop drawings can eliminate
Rework typically comes from predictable gaps. Understanding these gaps helps prioritize the details that matter most.
- Unresolved clashes, ductwork through beams, pipes crossing cable trays, sprinkler mains competing with lighting and ceilings.
- Missing connection design, steel connections, embeds, anchors, base plates, reinforcing laps, and pour stops not fully defined for fabrication.
- Inconsistent dimensions, plan versus elevation mismatches, offsets that shift grids, or dimensions taken from scaled drawings.
- Field conditions not verified, slabs out of level, walls out of plumb, existing structure different from record drawings.
- Unclear responsibilities, nobody owns sleeves, backing, supports, firestopping, or access panels, so they get missed.
- Late selections, equipment submittals arrive after framing and services are installed, forcing relocation.
- Incomplete sequences, waterproofing and facade transitions installed without understanding downstream work, causing leaks and removal.
Definitions, design drawings versus shop drawings versus as built
Design drawings are issued by the architect and engineers. They set the intended performance, layout, and major assemblies. They often include typical details and general notes that require interpretation by fabricators and installers.
Shop drawings are prepared by those who will fabricate or install the work. They provide specific dimensions, part numbers, connection methods, and coordination with other building elements. They should reference the relevant specification sections, codes, and approved product data.
Coordination drawings combine multiple trades into a single coordinated view. They may be produced as part of BIM coordination or as 2D overlays. Their purpose is clash prevention and interface definition.
As built drawings record what was actually installed. Good shop drawing practices make as built documentation easier because the approved model or drawings already reflect coordinated decisions, and field changes are tracked formally.
The rework prevention mindset, treat details as risk controls
Every unclear detail is a risk. Shop drawings are a risk control tool. The best teams treat them like a safety program for quality, by identifying the highest risk areas early and forcing decisions before work starts. Instead of a reactive approach based on field problems, proactive detailing focuses on high impact zones such as penetrations, transitions between assemblies, heavy equipment rooms, facade perimeters, wet areas, fire rated corridors, and seismic bracing zones.
When the process is mature, the team does not just “submit shop drawings.” It plans shop drawing milestones tied to procurement, mockups, and installation starts. It assigns clear review responsibilities. It uses checklists that reflect known failure points. It ensures the field has current approved information and understands the intent behind key details.
Planning the shop drawing scope, what must be shown to be buildable
Scope clarity is critical. Many rework events happen because someone assumed a detail was “by others.” A shop drawing scope matrix should confirm what is included in each trade’s submittal and what is required for coordination.
At minimum, the scope should define responsibility for:
- Hangers, supports, and seismic restraints, including anchors and embed requirements.
- Penetrations, sleeves, blockouts, and openings, including who provides and who installs them.
- Firestopping and fire rated assemblies at penetrations and joint lines.
- Backing, framing, and fixing points for finishes, casework, handrails, and equipment.
- Flashing, membranes, and sealant transitions at openings and facade interfaces.
- Access and maintainability, including access panels, clearances, and service zones.
- Temporary works or sequencing requirements when they affect permanent work.
Engineering details that most often prevent rework
Some details have an outsized impact. If they are correct, coordinated, and approved early, they eliminate large categories of rework.
1) Connections and load paths
For structural steel, precast, and heavy equipment supports, the connection is where fabrication meets engineering reality. The shop drawing must show connection geometry, bolt grades, weld sizes, edge distances, stiffeners, plate thicknesses, site versus shop welds, and any slip critical requirements. It also must show how loads transfer into the supporting structure, including any required local reinforcement or casting tolerances for embeds.
2) Anchors and embedded items
Embedded plates, anchor bolts, post installed anchors, and cast in channels frequently cause rework when location, edge distance, or embed depths are wrong. Shop drawings should include anchor schedules, templates, concrete edge distances, drilling limitations, torque requirements, proof testing, and corrosion protection. For post installed anchors, the drawing should identify whether the anchor is cracked concrete approved, seismic rated, or subject to special inspection.
3) Tolerances and adjustment
Design intent often assumes perfect geometry. Construction reality includes tolerances, deflection, camber, and movement. Shop drawings should show tolerance allowances, field adjustment methods such as slotted holes or shim ranges, and how alignment will be achieved. Without these, crews may force fit components, leading to distortion, leaks, cracking, or premature failure.
4) Movement, deflection, and expansion joints
Building movement is a common source of cracking, facade leakage, and ceiling damage. Shop drawings should show where movement joints are located, the expected movement range, and how adjacent systems accommodate it. Examples include slip tracks at partitions, facade anchor details that allow vertical movement, flexible connections for piping at seismic joints, and ceiling perimeter details that accommodate deflection.
5) Fire, smoke, and acoustic continuity
Fire rated construction fails when continuity is broken by uncoordinated penetrations, missing sealants, or wrong materials. Shop drawings should reference tested assemblies, identify required sealants and collars, show joint treatments, and define inspection access. Acoustic performance similarly depends on continuity, resilient connections, and correct sealing at perimeters and penetrations.
6) Waterproofing and envelope transitions
Leaks cause some of the most expensive rework because they affect finishes and occupied spaces. Shop drawings must show waterproofing terminations, flashing laps, weeps and drainage, window to wall transitions, balcony and parapet details, and tie ins at penetrations. They should show sequencing so that each layer is installed in the correct order and protected.
7) Penetration framing and MEP coordination
Penetrations through structural elements require precise coordination. Shop drawings should show opening sizes, reinforcement requirements, framing members, firestopping, and the exact routing of services. In many projects, a consolidated penetration plan per floor is a major rework reducer.
8) Clearances, access, and maintainability
A system can be code compliant but unmaintainable. Shop drawings should show service clearances around equipment, access to valves and dampers, filter removal paths, and ceiling access panels. Including these details early prevents late layout changes and damaged finishes.
How to structure a shop drawing set so it is useful in the field
Field usability matters. A dense submittal that is technically correct but hard to interpret still leads to mistakes. A strong set is organized, legible, and self checking.
- Cover sheet and index with revision history and clearly defined scope.
- Key plans that show location references, grids, and datum points.
- Plans, elevations, and sections that show interfaces with adjacent trades.
- Details for typical and non typical conditions, highlighting transitions.
- Schedules for anchors, embeds, penetrations, hangers, valves, equipment, and finishes as relevant.
- Notes and references that point to specification requirements and code criteria.
- Hold points where field verification or inspection must occur before proceeding.
Coordinate first, then detail, the recommended workflow
The most important sequencing rule is simple. Coordinate geometry and interfaces first. Detail fabrication second. If detailing begins before clashes and responsibilities are resolved, the project will either rework drawings repeatedly or rework installed work later.
A typical high performance workflow looks like this:
- Step 1, gather constraints, contract drawings, specifications, approved product data, site surveys, and existing conditions.
- Step 2, build a coordination model or overlay, align grids, levels, and datum, then add each trade to a common environment.
- Step 3, run clash checks and resolve conflicts, prioritize high impact zones like shafts, corridors, ceiling congested areas, and plant rooms.
- Step 4, freeze coordinated zones, set dates when areas become “locked” for fabrication to start.
- Step 5, produce trade specific shop drawings, now based on coordinated geometry and agreed interfaces.
- Step 6, internal QA review, verify dimensions, code requirements, and completeness before formal submission.
- Step 7, submit, respond, resubmit, track comments, close them out, and issue approved for construction sets.
- Step 8, field verification and installation feedback, capture deviations and feed lessons learned into subsequent areas.
Review and approval, how to avoid paper approvals that still fail in the field
Approvals do not guarantee constructability. They only confirm conformance with design intent to the extent reviewed. Preventing rework requires a layered review approach that includes constructability checks and coordination checks.
A practical review stack includes:
- Trade self check, the detailer verifies dimensions, part numbers, and manufacturer constraints.
- Fabricator check, confirms the drawing is buildable in the shop and matches capabilities.
- General contractor review, confirms coordination, access, sequencing, and scope completeness.
- Designer review, confirms compliance with design intent, code requirements, and specification criteria.
- Specialty engineer review when delegated design applies, such as connections, bracing, or facade engineering.
What prevents rework is not the stamp. It is the resolution of comments and the disciplined control of revisions. Approved drawings must be distributed to the right people, superseded versions must be removed from use, and field teams must understand which sheets govern which areas.
Delegated design, get the boundaries right
Many scopes include delegated design, where the specialty contractor or fabricator designs portions of the system. Examples include steel connections, cold formed framing, precast connections, curtain wall engineering, seismic bracing of MEP, and proprietary anchoring systems. Rework happens when the boundary between the engineer of record and the delegated designer is unclear.
A delegated design plan should clarify:
- Design criteria, loads, drift, deflection limits, performance requirements, and referenced codes.
- Submittal requirements, calculations, stamped drawings, and inspection needs.
- Interface responsibilities, who provides supporting structure, embeds, and attachment points.
- Change control, how design changes are communicated and approved.
Trade by trade details that most often stop rework
Different systems fail in different ways. Below are frequent rework triggers and the shop drawing details that address them.
Structural steel
- Connection types and member end conditions clearly shown at every node.
- Camber, cope, and hole locations aligned to shop tolerances and erection sequence.
- Base plate details with grout thickness allowances, leveling methods, and anchor rod templates.
- Openings and penetrations through beams coordinated with MEP, including reinforcement requirements.
- Stair and handrail interfaces, embeds, and slab edge conditions coordinated early.
Reinforcing steel and concrete
- Bar placement drawings that include laps, hooks, congestion checks, and clear cover compliance.
- Coordinated sleeve and blockout plans to keep rebar continuity intact.
- Embed and anchor setting drawings with tolerances and survey control points.
- Pour sequence planning for construction joints, waterstops, and curing access.
- Edge form and pour stop details at slab openings and facade edges.
Precast and tilt up
- Lifting points, inserts, and bracing requirements clearly shown for safe handling and stability.
- Connection details with tolerances, shim packs, and weld access defined.
- Joint sealant and backer rod details, including primer requirements and joint sizing.
- Interface with structure and facade components, especially at corners and parapets.
Building envelope, curtain wall, windows, and cladding
- Water management strategy shown in section, including drainage paths and weep locations.
- Flashing and membrane continuity at sills, heads, jambs, and slab edges.
- Thermal breaks and insulation continuity to prevent condensation and thermal bridging.
- Movement accommodation at floor slabs and structure, including live load deflection.
- Anchorage that accounts for substrate tolerances and survey results.
Drywall partitions and ceilings
- Head of wall deflection tracks, fire and smoke seals, and acoustic seals shown per wall type.
- Backing and support locations for TV mounts, millwork, grab bars, and heavy fixtures.
- Ceiling coordination with lights, diffusers, sprinklers, speakers, access panels, and maintenance paths.
- Soffit framing details at MEP conflicts, including access requirements.
HVAC ductwork
- Coordinated duct routing with clearances, access to dampers, and insulation thickness included.
- Hanger and support details, including seismic bracing and coordination with structure.
- Equipment connection details, vibration isolation, flexible connections, and condensate management.
- Balancing device locations, test ports, and commissioning access.
Plumbing and drainage
- Slope verification for gravity lines, avoiding structural clashes and maintaining ceiling heights.
- Cleanout locations coordinated with finishes and access panels.
- Pipe support spacing, seismic restraints, and anchor requirements detailed.
- Water hammer control, expansion loops, and hot water recirculation balancing provisions.
Fire protection
- Hydraulic design assumptions aligned with drawings, hazard classifications, and water supply data.
- Sprinkler head locations coordinated with reflected ceiling plans, soffits, beams, and lighting.
- Seismic bracing and sway bracing layouts coordinated with other services.
- Clear identification of inspector test connections, drain locations, and valve access.
Electrical, lighting, and low voltage
- Conduit routing and cable tray elevations coordinated to avoid clashes and preserve access.
- Equipment footprints, working clearances, and code required access zones shown.
- Penetration plans that align with fire rated assemblies and include firestopping responsibilities.
- Lighting layout aligned with ceiling coordination, avoiding conflicts with sprinklers and diffusers.
Controls and commissioning interfaces
Rework is common when controls are treated as an afterthought. Shop drawings and submittals should include points lists, wiring diagrams, network requirements, sensor locations, and coordination for access to controllers. Commissioning plans should reference these documents so functional testing does not trigger rework late in the project.
Model based coordination, using BIM to prevent rework
BIM is most effective when it is used to make decisions, not just to visualize. A coordinated model can prevent clashes, but only if the team agrees on model standards, level of detail, and decision authority.
Important BIM practices that reduce rework include:
- Shared coordinates and datum, consistent grids, levels, and reference points.
- Modeling tolerances, include insulation, clearance zones, and access spaces, not just centerlines.
- Clash rules, focus on “hard” clashes and “soft” clearances such as maintenance access.
- Issue tracking, every clash becomes an assigned issue with a due date and responsible party.
- Sign off gates, freeze zones when coordination is complete so fabrication can proceed.
Even without full BIM, the same thinking applies using 2D overlays and coordination workshops. The goal is the same, make conflicts visible early and close them before installation.
Constructability reviews, ask the field before the field is forced to fix it
A constructability review is a structured check of whether the work can be installed safely, efficiently, and in the correct sequence. It should happen early, before long lead procurement and before the first installation in a zone.
Constructability questions that commonly prevent rework include:
- Can the component physically fit into the building through available openings and routes?
- Is there crane or lifting access, and does the sequence account for it?
- Are there inspection hold points that require openings to remain accessible?
- Do we have the required substrate readiness, such as cured concrete strength or embedded items installed?
- Is there a clear method to achieve alignment and level within tolerances?
- Are temporary supports needed, and are they detailed and permitted?
Field verification, the missing step that turns drawings into reality
Even the best details fail if they assume perfect site conditions. Field verification provides the missing feedback loop. It includes surveys, laser scans, and physical measurements captured before fabrication or before finalizing installation drawings.
Field verification is especially important for:
- Renovations or tie ins to existing buildings.
- Facade anchorage where slab edges and embeds vary.
- Prefabricated MEP racks where fit is tight.
- Stairs, rails, and architectural metals that rely on accurate dimensions.
- Equipment replacements where footprint and connections vary by manufacturer.
When verification identifies deviations, the shop drawing should show the revised dimensions and the chosen remediation method, such as shimming, adjustable anchors, or local reframing. This prevents improvised fixes in the field.
Quality control within shop drawings, build in self checking
Shop drawings should not only describe what to build. They should help the team confirm it is correct. This can be done using built in checks, references, and measurable acceptance criteria.
- Show critical dimensions twice, plan and section, so inconsistencies are visible.
- Include datum references and benchmark notes for layout control.
- Provide torque values, grout requirements, curing times, and inspection criteria where relevant.
- Call out special inspections and test requirements, welding inspection, anchor testing, pressure tests.
- Reference tested assemblies for fire, smoke, and acoustic requirements, not generic notes.
Submittal schedules, connect shop drawings to procurement and sequencing
Rework is often a symptom of timing. If shop drawings arrive after work begins, the field will build from incomplete information. A submittal register should connect each package to lead times, review durations, and installation start dates.
High impact packages that deserve early attention include structural steel, embeds, facade, major equipment, switchgear, generators, chillers, air handling units, elevators, and prefabricated assemblies. These items often gate progress. Their shop drawings should be tracked as schedule critical deliverables, not administrative paperwork.
RFI reduction strategy, use shop drawings to answer questions before they become RFIs
RFIs are not inherently bad. They are a formal method of resolving ambiguity. But excessive RFIs indicate that coordination and detailing are happening too late. A practical goal is to convert many potential RFIs into closed coordination items inside the shop drawing process.
Ways to do this include:
- Hold coordination workshops focused on known conflict areas, like corridors and plant rooms.
- Require composite drawings for penetrations and ceiling coordination before framing closes.
- Use standardized detailing templates for typical conditions, including fire and acoustic requirements.
- Track recurring questions and update checklists so the same ambiguity does not repeat.
Change management, preventing rework when changes are unavoidable
Projects change. Owners adjust scope, products become unavailable, and conditions differ from assumptions. Rework is minimized when changes are managed early and transparently.
Good change control for shop drawings includes:
- Clear revision clouds and revision notes describing what changed and why.
- Superseded drawing withdrawal and controlled distribution of current sets.
- Linking changes to RFIs, change orders, or architect’s supplemental instructions.
- Field communication, toolbox talks for major detail changes that affect installation.
- Updating models and records so as built documentation stays accurate.
Interfaces, where rework most often hides
Most installation errors occur at boundaries between scopes. Typical interface failure points include:
- MEP penetrations through fire rated walls, responsibility for sleeves and firestopping unclear.
- Facade to structure connections, embed locations and tolerances not coordinated.
- Ceiling systems where lighting, sprinklers, diffusers, speakers, and access panels compete for space.
- Wet area waterproofing at drains, curbs, and transitions to walls and doors.
- Equipment pads and housekeeping bases where anchor locations conflict with reinforcement or piping.
Shop drawings that explicitly show these interfaces, with responsibility notes and tested details, remove ambiguity that leads to rework.
Installation sequencing, detail the order, not just the final condition
Some details are only buildable in a specific order. If the order is not defined, the field may install in a way that blocks subsequent work or damages completed assemblies. Shop drawings can reduce this by indicating sequencing requirements, especially in envelope and waterproofing work, congested MEP zones, and areas requiring inspections before concealment.
Sequencing notes that prevent rework include:
- Install embed plates and sleeves prior to reinforcement placement or prior to pour, with inspection hold points.
- Coordinate framing closure dates with above ceiling inspections and pressure testing.
- Install membrane and flashing layers in specified order, protect during adjacent work.
- Set heavy equipment before final piping and conduit routing blocks access.
Documentation control, keep the field building from one source of truth
Rework can come from using the wrong revision. This is a document control issue. A robust system includes a central repository, controlled access, clear naming conventions, and a process for issuing approved for construction drawings.
Practical controls include:
- One official location for current approved shop drawings, available to supervisors and layout crews.
- Printed sets labeled with revision date, and a routine for removing obsolete sheets.
- Daily or weekly coordination to confirm upcoming work uses the latest approved details.
- Linking field reports and inspections to drawing revisions for traceability.
Inspection readiness, embed code compliance into the shop drawings
Inspection failures lead to rework even when the installation is otherwise correct. The fastest way to reduce inspection risk is to embed requirements into drawings and installation notes, so crews know what inspectors will look for.
Common inspection related details to include are:
- Firestopping system identification, tested assembly references, and material requirements.
- Anchor installation requirements, hole cleaning, torque, cure times, and test frequency.
- Weld procedures, weld sizes, inspection methods, and access for inspection.
- Pressure test points and acceptance criteria for plumbing and fire protection.
- Seismic bracing requirements and component labeling where applicable.
Prefabrication and modularization, shop drawings as a manufacturing tool
Prefabrication can dramatically reduce rework because it shifts work to a controlled environment. But it increases the need for precise shop drawings and verified dimensions. Prefabricated MEP racks, bathroom pods, and modular facade panels depend on accurate coordination and tolerance management.
Prefabrication shop drawings should include:
- Module lifting points, weights, and handling instructions.
- Transportation constraints and site access routes.
- Connection details at module interfaces, including tolerances and alignment methods.
- Inspection and testing requirements completed in the shop before shipment.
Common failure patterns, and how to design them out
Many rework events repeat across projects. Recognizing patterns helps teams focus on the few details that prevent the most pain.
- Pattern, missing blocking. Prevention, include a blocking plan and coordinate with finish schedules and accessories.
- Pattern, ceiling clashes. Prevention, require reflected ceiling coordination drawings with elevations and access zones.
- Pattern, embed misplacement. Prevention, use setting out drawings, templates, survey checks, and pre pour inspections.
- Pattern, waterproofing discontinuity. Prevention, provide transition details and require mockups with water testing.
- Pattern, equipment service conflicts. Prevention, include manufacturer clearance zones and service paths in coordination models.
How Gavril Construction Company Ltd can structure a rework resistant detailing approach
A repeatable approach is more valuable than heroic effort. A practical structure includes early identification of risk zones, disciplined coordination, and standardized checklists.
Core components of a rework resistant approach include:
- Early workshop to define scope boundaries, responsibilities, and critical interfaces.
- Submittal milestones tied to procurement and installation starts, with clear review durations.
- Coordination gates, floor by floor or zone by zone freeze dates for fabrication release.
- Detailing standards, consistent datum, naming, sheet organization, and revision protocols.
- Field verification plan for high precision areas and existing condition tie ins.
- Lessons learned loop, recurring issues become checklist items and standard details.
Shop drawing checklists that prevent rework
Checklists turn experience into consistency. Below are example checklist items that often catch issues before they reach the site.
General checklist for all shop drawings
- All drawings reference correct project name, area, grid lines, and levels.
- Scope is clearly defined, inclusions and exclusions stated.
- Interfaces with adjacent trades are shown, not assumed.
- Critical dimensions are given, not scaled, and match architectural and structural baselines.
- Tolerances and adjustment methods are stated.
- Fire rating, smoke, and acoustic requirements are addressed where relevant.
- Install sequence notes included where order affects performance.
- Revision history is clear and obsolete sheets are identified.
MEP coordination checklist
- Above ceiling elevations shown for duct, pipe, conduit, and trays.
- Insulation thickness and clearance zones included in coordination.
- Access to valves, dampers, cleanouts, and controls confirmed.
- Penetrations through rated assemblies are identified with firestopping approach.
- Seismic bracing does not conflict with other services or access.
Envelope and waterproofing checklist
- Water shedding strategy is clear, laps, terminations, drainage paths.
- Window and door flashings coordinate with WRB and air barrier continuity.
- Movement joints are provided and coordinated with structure and finishes.
- Transitions at balconies, parapets, and penetrations are detailed.
- Mockup and testing requirements are identified.
Structural and anchors checklist
- Anchor types and capacities match the specified system and substrate condition.
- Edge distances and embed depths are achievable and comply with design criteria.
- Connection details show weld and bolt requirements with clear access for installation.
- Special inspection and testing requirements are noted.
- Layouts are tied to survey control points and datum references.
Communication, how to keep every trade aligned
Even the most detailed shop drawing fails if it is not communicated and understood. Strong teams use short, purposeful meetings and visual aids to align installers, foremen, and inspectors.
Effective communication practices include:
- Pre install meetings for complex areas, using the drawings to walk the sequence.
- Coordination huddles with all affected trades, focusing on the next two to three weeks of work.
- Field markups and redlines captured immediately and routed through a controlled update process.
- Photographic records tied to drawing references for concealed conditions.
Measuring success, practical metrics for reducing rework
You cannot improve what you do not measure. Rework reduction can be tracked with a small set of metrics that reveal whether the detailing process is translating to field performance.
- RFI rate, RFIs per month or per floor, and percent related to coordination gaps.
- Rework hours, tracked by trade and root cause category.
- First pass inspection rate, percent of inspections approved without correction.
- Submittal cycle time, average time from submission to approved for construction.
- Clash resolution rate, number of open issues over time in coordinated zones.
When these metrics improve, it is typically because shop drawings are becoming more complete, coordination is happening earlier, and revisions are controlled.
Common misconceptions that lead to rework
Misconception, shop drawings are only paperwork. Reality, they are the installation plan. If they are rushed, the field becomes the coordination tool, which is the most expensive place to coordinate.
Misconception, coordination is only for BIM projects. Reality, coordination is a mindset. Even a 2D project can coordinate penetrations, elevations, and interfaces using overlays and focused workshops.
Misconception, the designer will catch everything. Reality, designers review for intent and compliance, not full fabrication feasibility. The contractor team must own constructability and sequencing.
Misconception, tolerances do not matter if dimensions are correct. Reality, tolerances define whether components can be installed without force fitting, shimming beyond limits, or cracking finishes.
Practical example scenarios, how details prevent rework
Scenario 1, ductwork conflicts with beams
If duct routing is detailed without structural coordination, the field ends up cutting and patching or redesigning on the fly. A coordinated shop drawing shows duct elevations, beam depths, required offsets, and any approved openings or framing solutions before fabrication. The result is duct fabricated correctly the first time, with predictable pressure drop and access maintained.
Scenario 2, facade leaks at slab edge
Leak rework often requires removing finishes, resealing, and sometimes replacing assemblies. Shop drawings that show continuous air and water barrier ties at the slab edge, compatible materials, and correct lap sequencing reduce this risk. Adding a mockup and water test tied to the drawings confirms performance before full installation.
Scenario 3, mislocated embeds for handrails
Handrails and guards are sensitive to alignment and code heights. If embeds are mislocated, repairs can involve drilling, patching concrete, and aesthetic issues. Embed setting drawings tied to survey control points, with templates and pre pour checks, catch the issue early. The rail then installs without site welding or awkward field modifications.
Scenario 4, firestopping failures at penetrations
Firestopping rework is common when the penetration is not documented or the wrong system is used. When shop drawings include a penetration schedule and reference specific tested firestop systems, installers know exactly what to install and inspectors have clear criteria. This reduces failed inspections and reopening of finished areas.
Responsibilities and collaboration, who does what
A clear responsibility map prevents gaps. While each contract differs, typical roles include:
- Owner, sets performance priorities, approves major selections, supports timely decisions.
- Architect and engineers, define design intent, performance criteria, and review submittals for conformance.
- General contractor, coordinates trades, sets submittal schedule, runs constructability, controls document distribution.
- Subcontractors and fabricators, produce shop drawings, verify field conditions as required, install per approved documents.
- Special inspectors and commissioning agents, verify compliance, witness tests, confirm performance.
Collaboration works best when issues are resolved at the lowest level possible, with clear escalation for design changes and scope impacts.
What to include in your next project, a prioritized action list
If you want the most benefit with the least disruption, focus on these actions first. They align with the “most important information first” principle, because they address the biggest rework drivers.
- Start coordination early, especially for penetrations, ceiling spaces, and plant rooms.
- Freeze zones for fabrication, do not detail everything at once, lock one area at a time.
- Demand interface details, show boundaries between trades and who owns what.
- Embed tolerances and adjustment, do not rely on perfect site geometry.
- Build inspection criteria into drawings, especially for anchors, firestopping, and rated assemblies.
- Use field verification for high precision and existing condition work.
- Control revisions, ensure the field builds from approved, current information only.
Conclusion, details are cheaper than rework
Shop drawings are not a formality. They are the practical engineering translation of design into construction reality. When they include the right level of coordinated detail, especially at interfaces, tolerances, movement, anchors, penetrations, fire and acoustic continuity, and waterproofing transitions, they prevent the most common rework events that drain time and budget.
By treating “design to shop drawings” as a structured process, not a last minute submission, project teams can convert uncertainty into decisions, convert general notes into buildable details, and deliver predictable outcomes. For Gavril Construction Company Ltd, this approach supports a simple goal, build it once, verify it once, and move forward with confidence.